Friday 28 October 2011

Exercise: Measuring Exposure Part 2

For this second part I had to take 5 or 6 different photographs 5 times varying the exposure.  The first is one stop darker, the second half a stop darker, the third average, the fourth half a stop brighter and fifth one stop brighter.  

Here are the results. 

One stop darker - the best as it records the bolts more accurately

1/2 stop darker - still keeps the detail but a little brighter than reality

Average - the meter reading has made the image brighter.  Not acceptable to me as it is too bright.

1/2 stop brighter - again this is too bright and the blackness of the image is lost.

1 stop brighter - the darkness of this image is completely lost and the image looks over-exposed.

1 stop darker - gives mood to the image and brings out the red of the house.

1/2 stop brighter - the sky is beginning to look a little washed out

Average - makes the image look flat and the colour in the sky is lost.

1/2 stop brighter - this image looks over-exposed at the top

1 stop brighter - the image  is greatly over-exposed

1 stop darker - the bricks are deep and colourful and this works well.

1/stop darker - the bricks have lost a little colour but this image is still acceptable.

Average - the average reading has given a washed out effect to the colour in this scene. It is still acceptable though.

1/2 stop brighter - the bricks look much brighter and very different to the first image.  They are still acceptable but no longer look like real bricks.

1 stop brighter  and over-exposed.  Nearly all detail is lost.

1 stop darker - I feel this is too dark and some of the detail is lost in the shadows.

1/2 stop darker - still some detail lost in the shadows but it is better than the first image.

Average - this gives a good and fairly accurate recording of what the scene was actually like.  There's more detail that the darker images.

1/2 stop brighter - this is also good and the greens are vibrant.

1 stop brighter - the greens are a little too bright.  I think average works best for colours like green because it gives a more realistic reading for the colour.

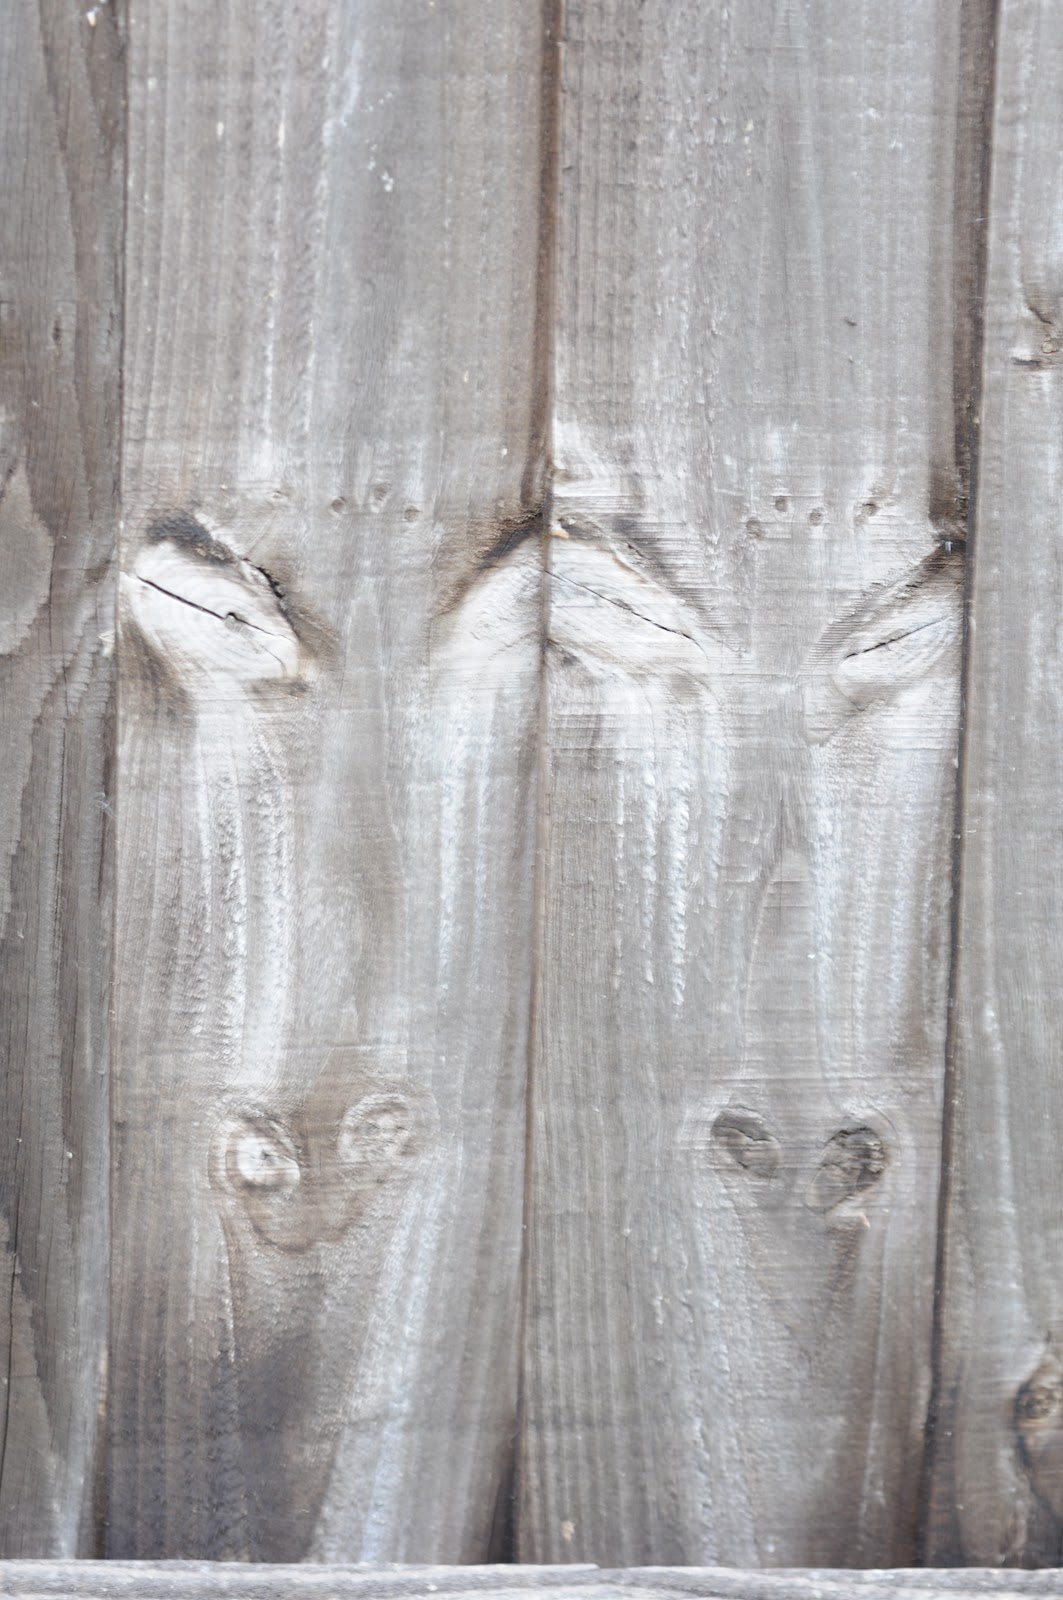
This detail is from my garden fence and looks like 2 horses' faces. 
1 stop brighter and it has a dark mysterious air.  You can see the texture.

1/2 stop brighter - this still holds the texture of the wood.

Average - gives an average that is pretty acceptable.

1/2 stop brighter - takes on a different hue and the whites become brighter.  A very different scene but it still works.

1 stop brighter - this also is bright and works well.  A good example of how the light can change a subject into something very different.


 On the whole the average reading are nothing more than that - average.  They meet what we would call an acceptable exposure.  however, if you want to show and record the scene as it really is and capture the shadows, highlights and colour more realistically varying the amount of light hitting the sensor will allow you to do that. 

Exercise: Measuring Exposure Part 1

For the first part of this exercise I had to take about 4-6 photographs which are deliberately lighter or darker than average and explain why.

This lock on this white garage door is a brighter than average.  An average reading here would have made the white door grey so I over-exposed to make it whiter and more realistic of what i was seeing in fornt of me.

I used spot metering for this shot to make sure that the brightness of the white was not lost and remained white and not grey.  This works well as it doesn't have a noticeable affect on the brickwork.  Therefore I didn't have to compromise the scene.

This section of a black wooden door was under-exposed to ensure it maintained the darkness of the wood.  An average reading would have made it lighter in colour and lost some of the texture.

This shot was over-exposed to show how this scene can be made brighter and give a different effect than under-exposing as in the example below.  Both these shots are more interesting as they give different versions of the same thing but adjusting the amount of light that enter the camera.

Light

Light is the language of photography.  It determines how we take a picture. 

Sensors on cameras are designed to work best in normal daylight.  Lower light levels require the sensor settings to be more sensitive ie a higher ISO setting.  But it's not just as simple as that.  Higher ISO settings introduce more noise into the image and this may be a problem. 

The intensity of light
Brightness varies through the day from dawn till dusk.  The sun is brighter during the day than at sunset or sunrise. Cloudy and foggy days are also darker.  Understanding this is very important as our eyes can adjust for these changes but the cameras sensor can't.

The normal ISO setting for daylight shooting is 100-200.   Increasing this makes the sensor more sensitve to light together with the ability to shoot in lower light.

Measuring brightness
Sensors are less efficient that our eyes at recording the light that is in a scene as they cannot cope with the same dynamic range as our eyes.

Cameras measure brightness using their in-built metering systems. 

There are 3 types:
  • Centre weighted
  • Matrix
  • Spot
Centre-weighted and matrix weight their readings in anticipation of how you would compose and take pictures. Average centre-weighted reading ignores any thin bright strip at the top due to the fact that that is where the sky usually is.

Matrix is far more advanced and takes readings from several points in the image and compares it to a database of similar known types of scene.

Spot is exactly what it says it is - a reading taken of a small area.  This is useful and accurate for certain types of scenes or compositions for exmaple where there is a bright object with a dark background.

The basis for all averaged readings results in a mid tone or 50% brightness or 128 on a scale from 0-255.  However, depending on your scene you which may be brighter or darker than 50% you may need to adjust exposure accordingly.  This can be done by using M mode or the Exposure Compensation control.